WinVICE
 | ||
| Developer | Andreas Boose Tibor Biczo | |
| Company | VICE-Team | |
| Publisher | ||
| Release | 2005 | |
| Licence | GPL | |
| Platform | Acorn RISC OS, Amiga, BeOS, DOS, Mac OS X, Linux, OS/2, Solaris, Windows | |
| Genre | Emulator | |
| Operation | ||
| Media | D64, T64, CRT, x64, g64, etc. | |
| Language(s) | ||
| Information | Latest Version: VICE 3.5 (24.12.2020) | |
Description[edit | edit source]
VICE (Versatile Commodore Emulator) is an emulator for the Commodore 8-bit computer range. The Windows port of VICE is called WinVICE and emulates the C64, the C128, the VIC20, all PET models (except the SuperPET 9000), the PLUS4 and the CBM-II (aka C610). Every system can be accessed by an executable file (e.g. x64.exe for the C64).
Important note[edit | edit source]
The WinVICE version 1.17 contains a bug, which will crash the emulator after more than one hour runtime at normal emulation speed. This bug has been eliminated in version 1.18 and higher.
Features[edit | edit source]
With the history function it is possible to record and replay the emulated action. Even when recording several hours the resulting files won't exceed a couple of megabytes and thus can be easily emailed etc. Furthermore when replaying one can abort playback and take on the action himself at any time.
Comments[edit | edit source]
Getting started[edit | edit source]
Installation[edit | edit source]
After downloading WinVICE you get a zip file, which is called:
WinVICE-x.y.zip whereas x is the major and y the minor version number (e.g. WinVICE-1.20.zip).
WinVICE doesn't have an installer, so you just have to extract the zip file to any place on your harddrive. I put it at: C:\Program Files\WinVICE-1.20\
To start the C64 emulator you just have to execute the file x64.exe in the main folder of WinVICE. Shortcuts at the Start Menu, on the Desktop etc. have to be created manually.
Settings[edit | edit source]
Video Settings[edit | edit source]
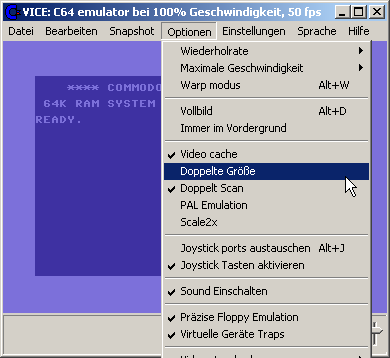
Only few to no changes are required in this section for a start. If you fancy a bigger appearance of the screen, just hit Double size in the menu Options as viewed in the picture on the right. A blurred C64 screen - as a TV picture imitation - can be achieved by ticking the option PAL Emulation in the same menu.
Fullscreen should be self-explanatory. It can also be activated by pressing Alt and D simultaneously while the emulation is running. Just do the same again to return to windowed mode.
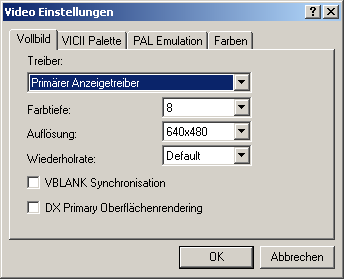
To alter the fullscreen resolution call up the menu Settings and select Video settings. A new window will appear like shown in the picture on the right.
Joystick emulation[edit | edit source]
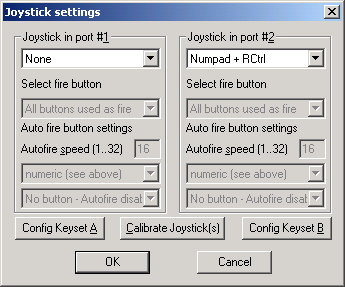
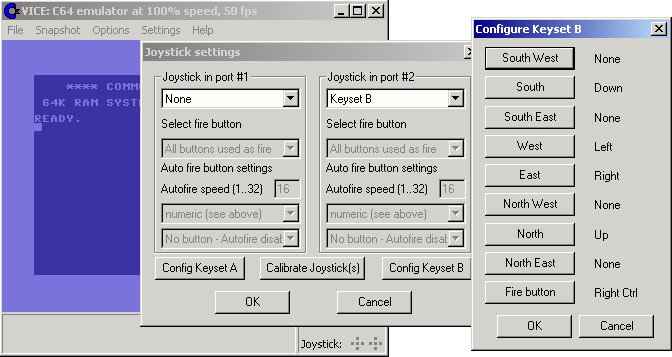
To control your man you can use the keyboard. Either you choose the setting as viewed in the picture. This way you can use the cursor keys on the numpad and the right Ctrl key. This setting is recommended as it doesn't interfere with the C64 keyboard.
Or you name the keys for joystick control by your own. Only the directions South, West, East, North and the Fire button need to be set. The other keys may also be assigned if required.
It is important that you allocate only one joystick port like shown on the two pictures. Port 2 is recommended because most games demand a joystick in port 2.
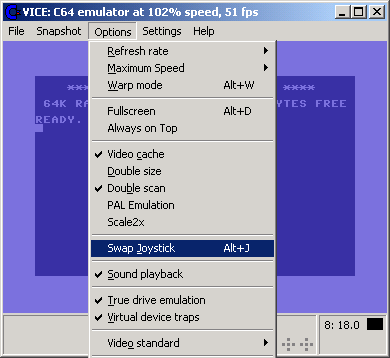
If you come across a game that demands a joystick in port 1, you can easily swap the two ports by choosing it in the Options menu. Or press Alt and J simultaneously while the emulation is running.
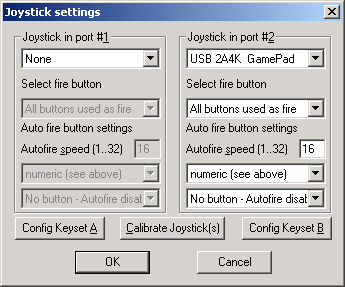
It is also possible to control your man with a PC-Gamepad or -Joystick. Therefore it must be installed and calibrated under Windows correctly. That means the gamepad must work with Windows games. To use it in WinVICE you have to select it from the list in the Joystick settings. An example is shown in the picture on the right (it's a Competition Pro USB there btw.).
Miscellaneous settings[edit | edit source]
The two settings True drive emulation and Virtual device traps located in the menu Options are often the cause for games not working and therefore are kind of important. They are both ticked by default and I recommend to leave it like that. Only if a game won't work you can untick the Virtual device traps and try it again. The True drive emulation should always stay activated.
Saving the settings[edit | edit source]
Finally all settings should be saved so that you don't need to do them again everytime you call up the emulator. To do that hit the menu item Save current settings in the Settings menu.
Additionally you can untick the option Confirm on exit. This way you get rid of the annoying warning message when closing the emulator.
Starting programs[edit | edit source]
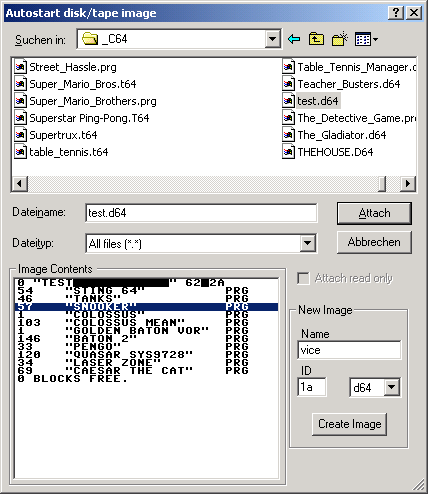
Different types of images can be used. One of the most used types is the disk image (.d64). Go into the menu File and choose the first menu item Autostart disk/tape image. A new window will pop up like shown in the picture on the right. Select the d64 file you are going to start and click onto Attach or do a double click onto the file itself. The game will be loaded and started automatically. You can reduce the loading time by pressing Alt and W simultaneously. In this so called Warp mode the whole emulation speed will be increased. After the loading has been finished switch the Warp mode off by pressing the same keys again.
If you have a d64 image with more than one game in it or the game can't be started with the first file, you have to choose the right game or boot file from the contents of the d64 image. Therefore you click once on the d64 file and then do a double click onto the according game in the section Image Contents. In the example on the right the game Snooker has been selected.
Disk change
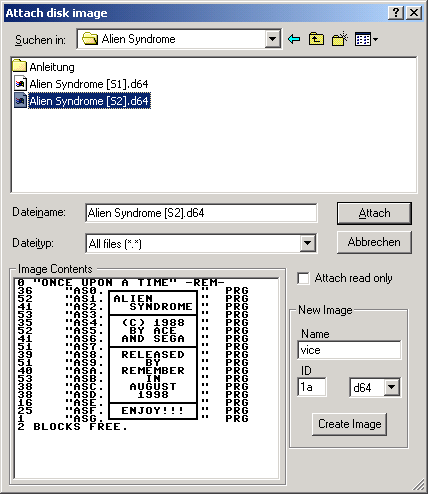
When playing games, which doesn't match on one disk side, you have more than one d64 image. You will be prompted to insert another disk or disk side occasionally. So when emulating you have to change the disk image in some sort of way. Therefore you hit the menu item Attach disk image in the File menu and then select Drive 8. As a shortcut you can just press Alt and 8 simultaneously during the emulation without going to the menu File first. Now a window will pop up which looks very similar to the one described in the Autostart disk/tape image feature. The difference is that the selected d64 file won't be executed but only be inserted into the virtual disk drive by clicking on Attach. This is analogue to the act inserting a floppy disk into the disk drive at a real C64. In most cases you have to press the fire button or a key to confirm the disk change. Usually the game will indicate this.
Snapshot[edit | edit source]
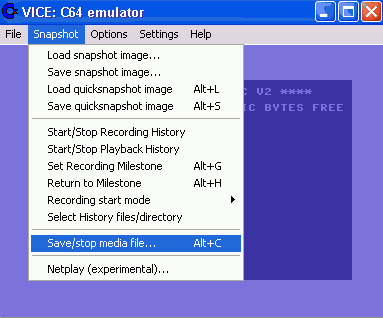
In this menu the current state of the emulation can be stored.
Game state (snapshot image), game progression (history) and video/screenshot (mediafile) are available.
Screenshot (media file)
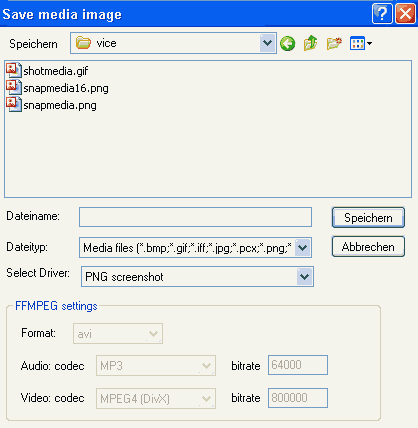
To make a screenshot hit the menu item Save/stop media file in the menu Snapshot. A new window will pop up where you can choose the image format and type in a file name.
Hints[edit | edit source]
Sometimes it happens that suddenly the mouse pointer disappears and doesn't come back when moving the mouse. In most cases the cause is that you accidentally hit the keys Alt and Q when (de)activating the Warp mode. This turns the 1351 mouse emulation on and off. Just hit Alt and Q again and the mouse pointer should return.
Downloads[edit | edit source]
- Download VICE
- Nightly builds by pokefinder (incl. ffmpeg+lame+jpeg+gif dll's)
- Windows nightly binaries unofficial nightly builds, also SDL and 64-bit binaries available
- Download VICE (binaries)
- Download VICE (experimental binaries)
- Download VICE (development releases)
Links[edit | edit source]
- The VICE Emulator - official website
- Tastaturlayout positional at webarchive.org

- VICE running on Ubuntu
- VICE for Ubuntu

Videos[edit | edit source]
- Video at YouTube Videotutorial von 2008
